I am currently on an epic road trip, driving from the Netherlands to South Africa . Follow along on Instagram .
Second Version of the Linear Clock Design
The linear clock has been on my desk since it has been finished. However, there were a few issues with the design that I wanted to address. First of all, the build quality could have been better, and the build process was quite involved. But more importantly, the display was not very readable in some conditions. In this update I will address these issues and present the second version of the linear clock design.
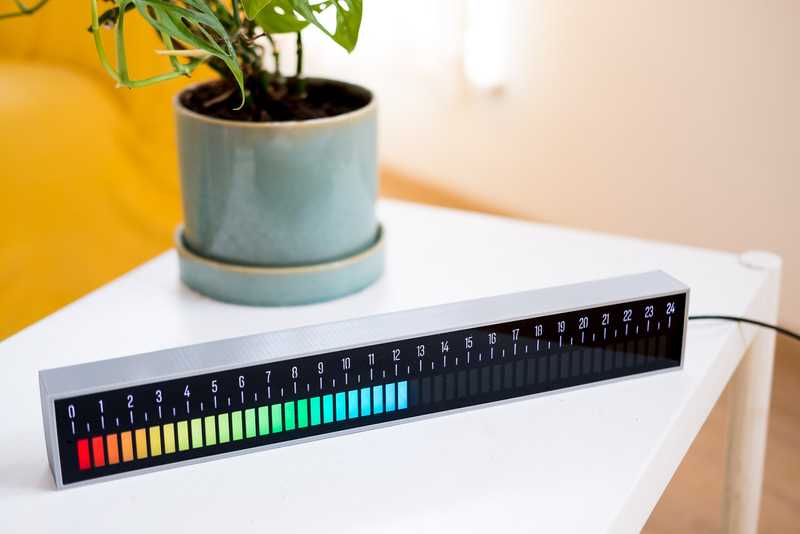
No clickbait practices here, so lets start by showing the finished product. I am quite happy with the way it looks and the improvements to the display. In the next sections I will discuss the design and some of the issues that it solves.
Second version of the linear clock
LED orientation
In the first version of the clock I used the principle of edge-lit acrylic. I discovered this shortly before starting the project and wanted to build something with it. It turned out quite well, but it also created some issues. I had to make small pieces of acrylic that contained the indivdual numbers, and assemble these into a single frame. Also, since the LED's had to be on the top and the bottom, it was not easy to make a custom circuit board for the clock.
The main change in this design is therefore that I ditched the edge-lit approach. Instead the LED's are right behind the clock face and shine in the same direction. With this the design could be simplified a lot. However, this also creates a new challenges, since the light needs to be diffused. But more on that later.
PCB design
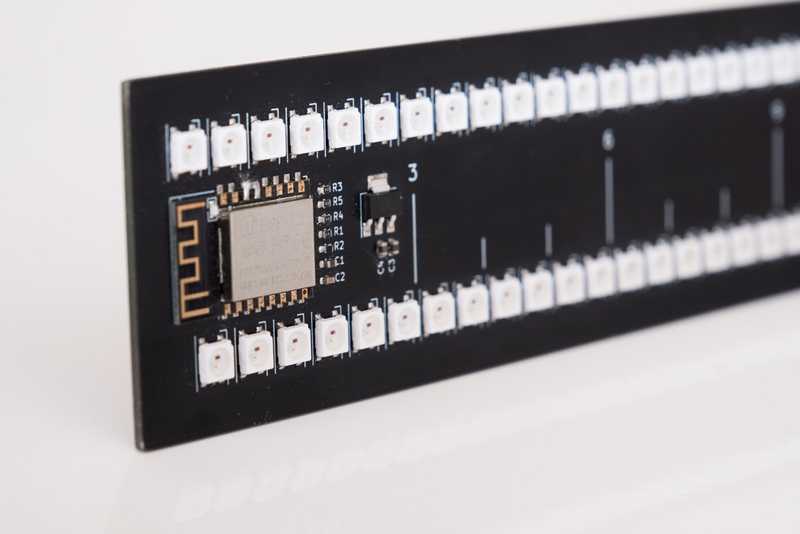
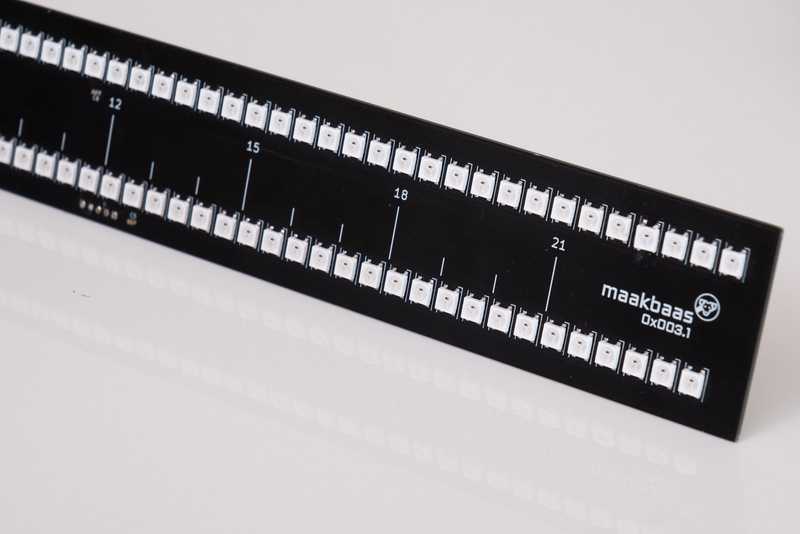
With the LED's behind the display it was easier to make a simple PCB, containg the ESP8266 and the individual lights as shown below. For the design I used WS2812B LED's from Worldsemi which are quite popular among makers. A quick tip: I found out that an updated version (version 5) of this LED is available, which is called the WS2812B-V5. This fifth version has two main advantages:
- There is no longer a need to have a capacitor for each LED. I know there are other LED's such as the WS2813 that address this, but with V5 this is also the case for the more common WS2812
- The WS2812-V5 explicitly accepts 3.3V logic signals. In the past 3.3V logic would probably work as well, but to be safe you had to use a level shifter. Not anymore.
Clock circuit board.
Design components
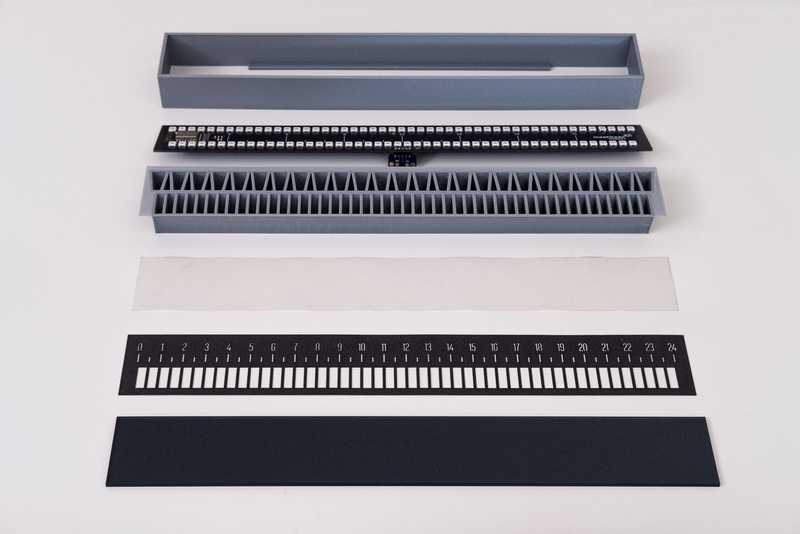
The first version of the clock had 106 individual component, which has now been reduced to 6 .
Parts of the clock.
From top to bottom these are:
- The housing. To be fair, I probably need to update this, since the USB port is sticking out in the back which is not the nicest solution.
- The circuit board.
- The light guides; these block the light leakage between different segments of the clock.
- A diffuser, in this case a piece of tracing paper cut to size.
- A laser cut piece of black cardboard containing the cut-outs for the clock.
- A grey transparent acrylic front face.
Old vs. New
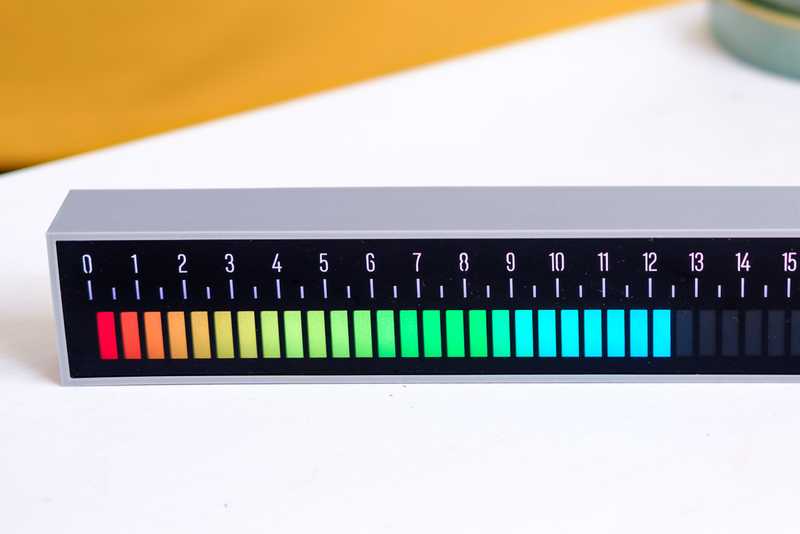
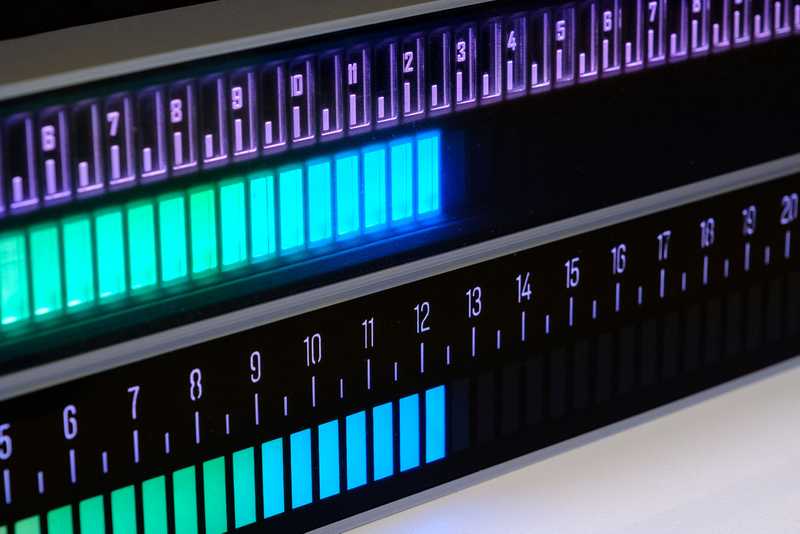
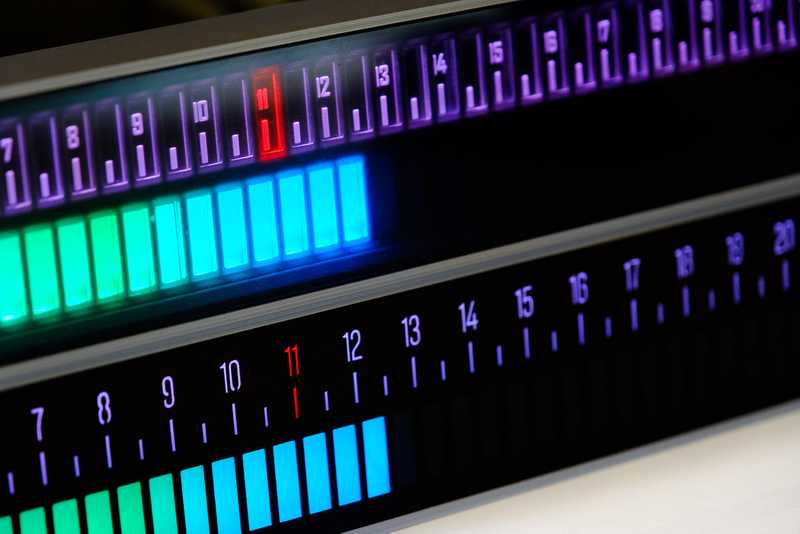
As you can see in the pictures below, the other advantage of the new design is readability. In the previous design with the LED strips the numbers had to be slightly recessed in the housing. Because of this the viewing angle of the clock was small. In the top picture you can see that 12, 13, 14... reads as 2, 3, 4... There is now also less light leakage around the numbers, and they are significantly larger in size. If you look closely you see that there are small gaps in the new numbers. This is required to keep everything in place, since this face is now laser cut. I custom designed this for the best readability.
Improved readability.
Finally, I also like the handling of colors a lot better with the new numbers. It could be really nice to use the LED bar to show a piece of information, while a cursor in the top bar indicates the current time. In my previous visualizations I did not use this effect simply because I thought it was ugly since the entire square around the number is lighting up. In the new design this is a lot cleaner, so it can be used without any problems.

